Recording and telehealth
Telehealth (Beta)
Run a video visit inside Nextvisit: send the patient link, admit the patient, transcribe live, and end the visit with a note in the chart.
Telehealth is in early beta. Contact support to get it enabled for your workspace. Once enabled, Telehealth appears in the sidebar and as a card on the Integrations page.
Telehealth runs the video visit and the note in the same chart. The transcript labels each speaker as Provider or Patient, and the note is generated from that transcript when the visit ends.
This article covers the Telehealth app. To capture audio from another video tool, see Telehealth Mode in Record a Live Session.
First-time setup
The first time you open Telehealth, the Set up telehealth page asks When should live transcription start?
- Start automatically: transcription starts when the patient has consented. Without consent, the visit continues and transcription stays off.
- Ask me each visit: shows a Start transcription control. Nothing starts until you choose it.
- Keep transcription off.
Click Save and open telehealth. Audio is used for live transcription and is not stored by Nextvisit.
Room settings
Click Room settings on the Telehealth page.
- Room link: Display name is shown to patients in the waiting room. Room address is the link patients open to check in.
- Behavior: Audio-only by default and Hold window (1 to 120 minutes) for how long a dropped visit stays open.
- Documentation: Default note picks the template used when you record a video visit, from Your templates or Built-in. You can change it during the call.
- Transcription consent: Ask for consent every visit. Owners and admins can Lock for all providers.
Send the patient link
You can share your room link or create a link for one patient.
- Click Copy room link to share your general room address.
- For a single patient, click Patient links, then New link.
- Fill in Label (patients never see it), Patient (optional, connects the link to a chart), and Expires (optional).
- Under Extra check, pick None, Date of birth, or 4-digit PIN. Share the PIN with the patient yourself.
- Click Create link. The Link ready dialog offers Copy link, Send by email, and Done.
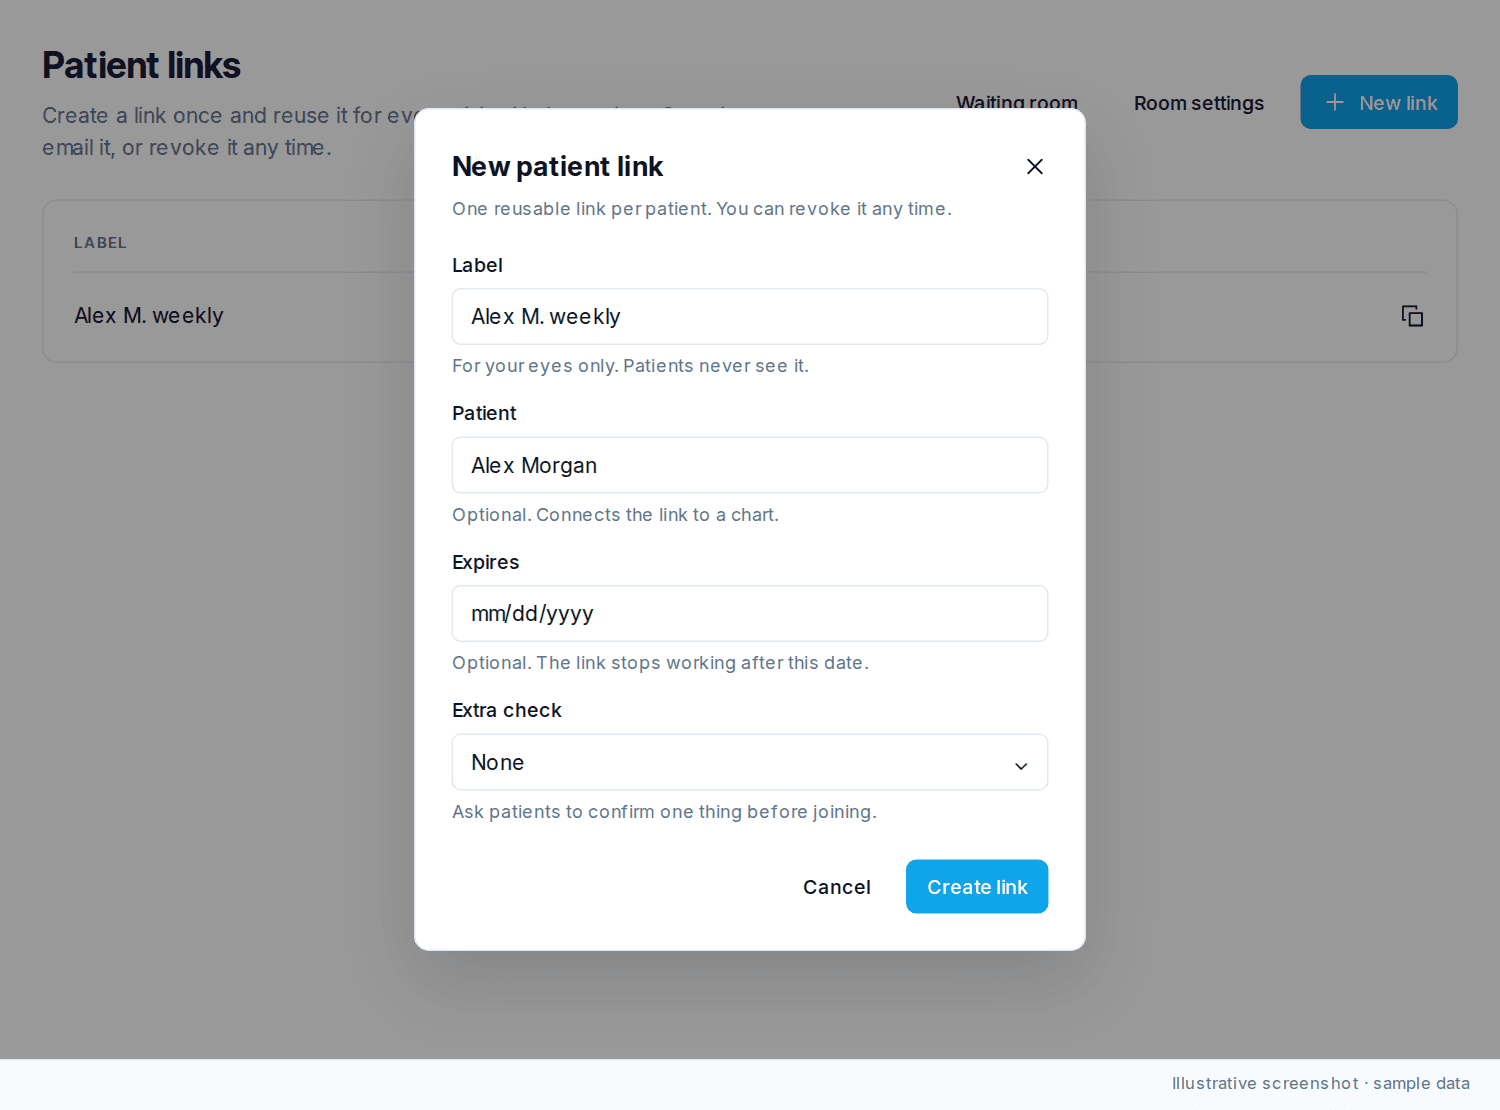
Each link row has Copy link, Send link, and Revoke link. Send by email opens your mail client with no recipient prefilled. Send by text message is not set up yet.
What the patient sees
- The patient opens the link. If you set an extra check, they enter their Date of birth or the 4-digit code.
- They complete the Check in form.
- They see the consent switch I agree to live transcription for this visit. They can join without agreeing; transcription stays off.
- On Get set up, the browser asks for camera and microphone. They pick Camera, Microphone, and Speaker, click Turn on camera and mic, and can Play test sound.
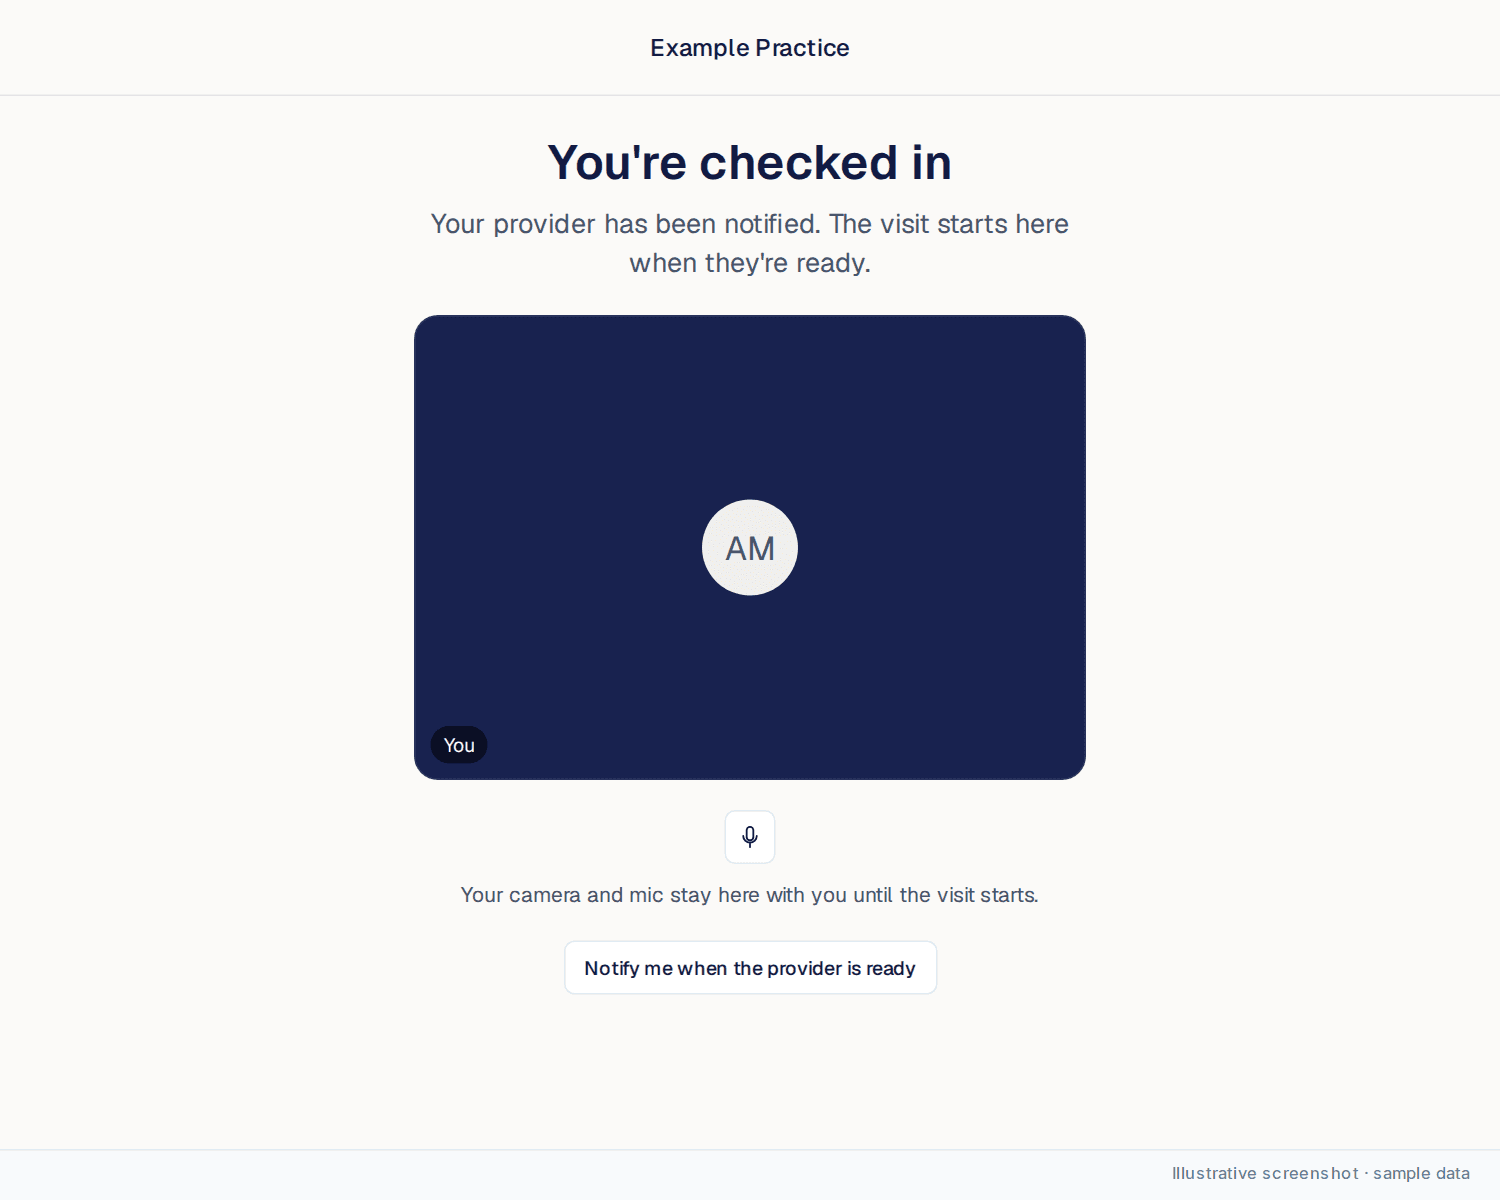
- They click Join visit and wait on the You're checked in screen until you admit them. Notify me when the provider is ready sends a browser notification.
In the call, the patient can mute, turn the camera off, Switch camera, Open chat, and Leave visit. A Live transcription on badge shows when transcription is running. If the patient leaves, the visit stays open and they can rejoin with the same link.
Start the visit
- Checked-in patients appear under Waiting room on the Telehealth page.
- Click Open visit on the patient card.
- Click Admit to visit. Back to queue returns without admitting.
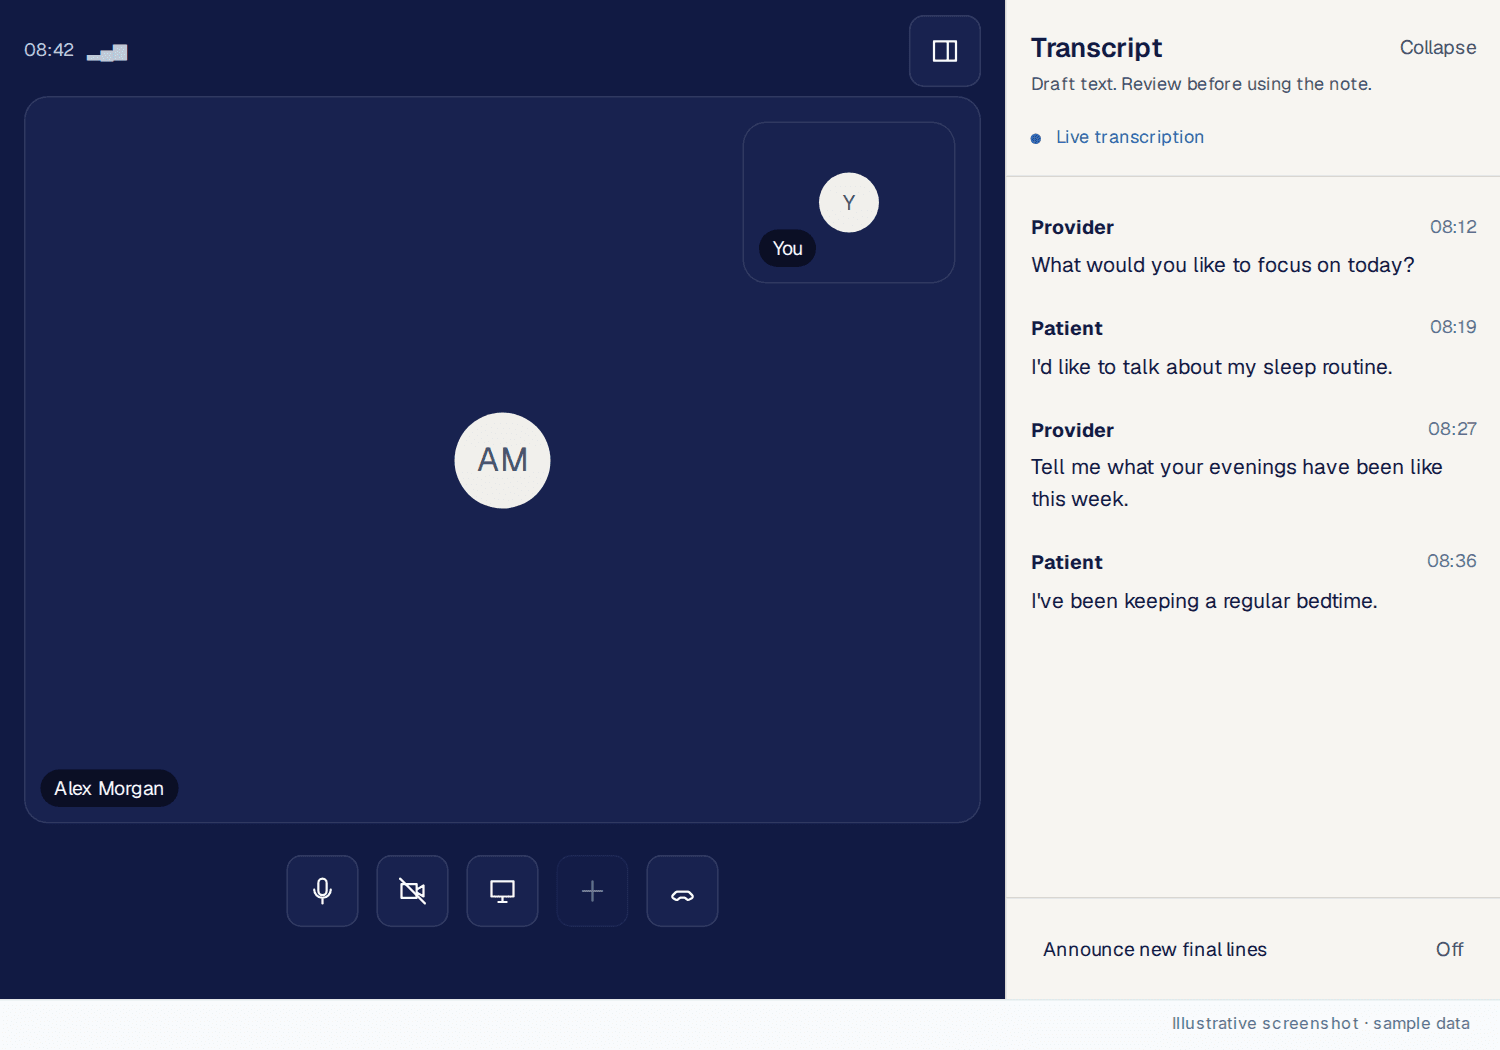
Call controls: Mute microphone, Turn camera off, Share screen, Leave call, and Open panel. The Visit details panel holds the check-in answers, chat, and the recorder. The Transcript rail shows Provider and Patient lines as they arrive.
Record and generate the note
In the Visit details panel:
- Pick the Note template from Your templates or Built-in.
- Add Visit context such as medications, allergies, and conditions.
- If the visit has no consent, ask the patient on camera, then turn on Patient gave verbal consent to transcription.
- Click Start transcription if your setting is Ask me each visit. Transcription can start after the patient is admitted.
- Use Add note and Insert note to pin a context note to the transcript at the current time.
Status labels show Live transcription, Transcription paused, Finalizing transcript, Transcript saved to chart, or Transcription off. Stop and save transcript pauses; Resume transcription continues.
End the call
- Return patient to waiting room keeps the visit open and moves the patient back to the queue.
- Leave call keeps the visit open. The patient can check in again with the same link. The card shows Rejoin call on the Telehealth page.
- End visit for everyone closes the visit. The Permanently end this visit? dialog shows the transcript state and offers Keep visit open or End visit. With no transcript, the button reads End without a transcript.
Ending the visit finalizes the transcript and starts note generation for the linked encounter. The patient sees Your provider ended the visit. Click Back to queue to return to the Telehealth page.
Was this article helpful?
Still stuck? Our team answers in the messenger.