Chart organization
Manage Patient and Encounter Tags
Organize your patients and encounters with custom tags for better workflow management.
Creating a tag
-
Click your profile icon in the bottom left corner, then select “Settings”
-
Click “Tags” in the Settings menu
-
Click “Create new Tag”
-
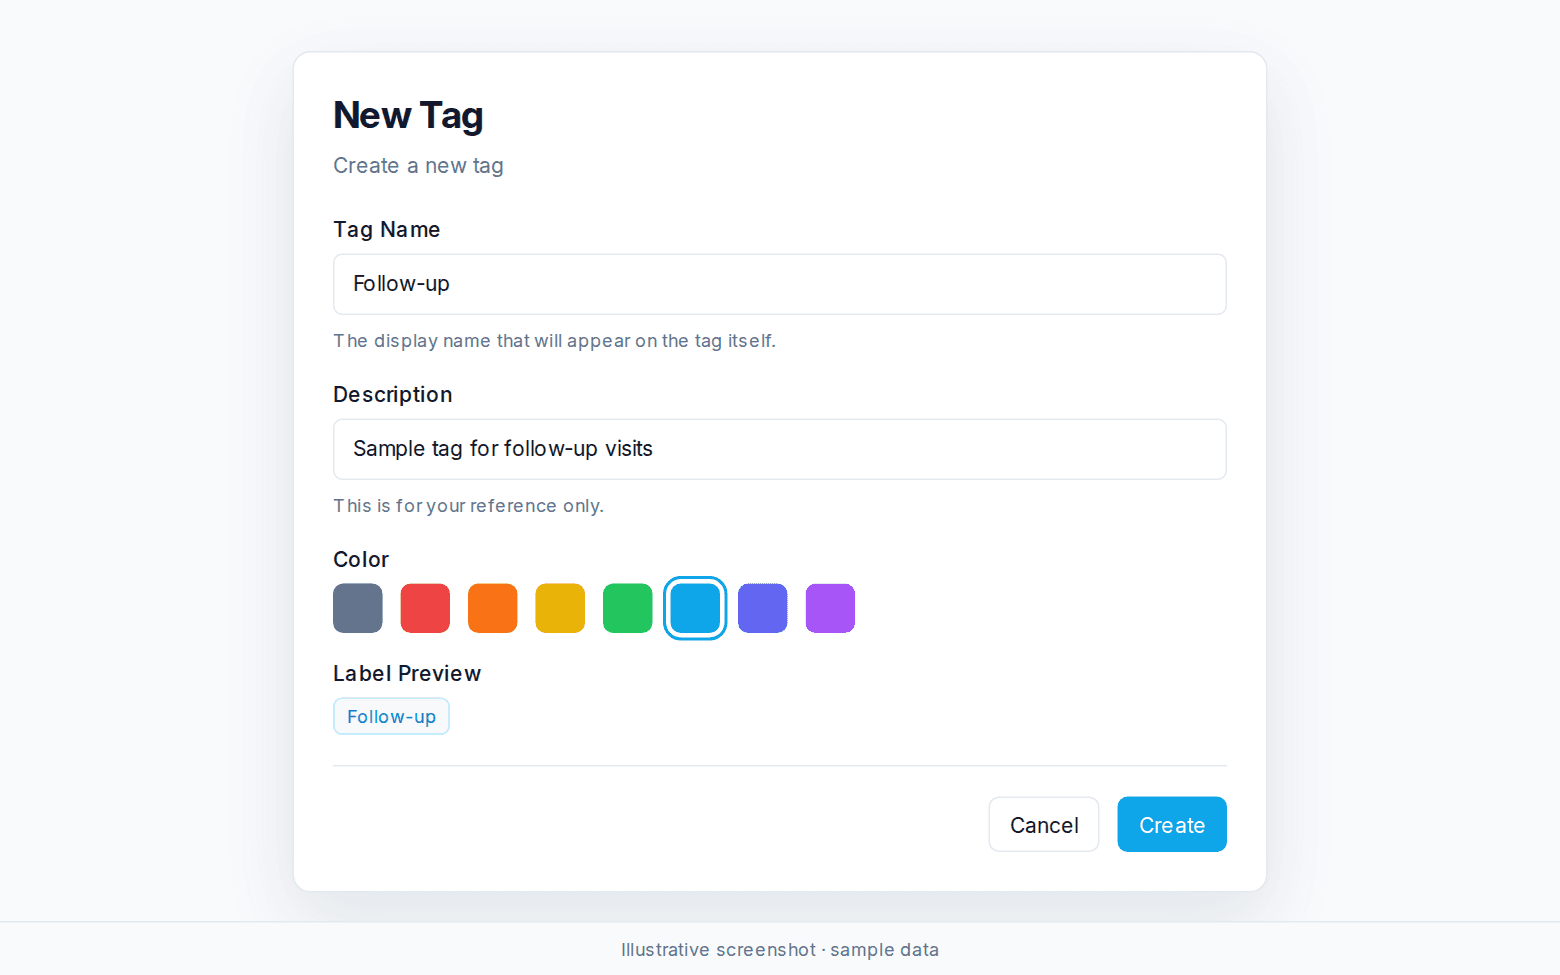
Configure the tag:
-
Tag Name: The display name shown on the tag
-
Description: Your internal reference note (not visible on the tag itself)
-
Color and Shade: Choose from the available palette
- Click “Create” to save
Assigning tags to patients and encounters
-
Open the patient chart or encounter you want to tag
-
Click the tag icon
-
Select the tags to assign
Filtering by tags
-
In your patient list or encounters view, click “Filters”
-
Select “Tags” from the filter options
-
Choose the tag(s) to filter by
Notes
-
Tags are shared across your workspace and available to all workspace members.
-
Tags only exist in the workspace where they were created.
Was this article helpful?
Still stuck? Our team answers in the messenger.