Templates and macros
Macros
Create text snippets with a slash trigger, add patient variables and fillable fields, pull starters from the library, and insert them in a note.
A macro is a saved snippet with a trigger. Type / and the trigger in the note editor or a supported textarea to insert it. Patient and session variables fill in automatically.
Open Apps → Macros in the sidebar, or Manage Macros from the Macros card on the Integrations page.
Macros overview
The Macros page
- All, Mine, and Shared tabs filter your macros. Search macros... searches by name, trigger, or body.
- Each card shows the trigger, category, usage count, and a Shared badge when a teammate shared it. The card menu has Edit and Delete.
- New macro opens a blank form. Browse library opens starters. Generate with AI drafts one from a description.
Create a macro
- Click New macro.
- Under Name and trigger, name the macro (for example, Normal MSE) and set the trigger you type after
/(for example,mse). If your trigger matches a shared macro, yours overrides it for you. - Write the Body. Click a chip to insert a variable:
- Patient info: Patient name, Age, Date of birth, Gender
- Visit info: Today's date, Your name, Session length (min)
- Make it interactive: Cursor lands here, Ask me a question, Leave a blank to fill in
- Add
|fallbackinside any variable for a default when the value is missing. Example:{{patient_name|the patient}}. - Add an optional Description and Category (for example, Exam, Plan, Greeting).
- Turn on Share with team to let teammates use the macro. They cannot edit it.
- Check the Preview on the right. It renders the body with a sample patient and lists prompts, blanks, and encounter data that fill on insert.
- Click Create macro.
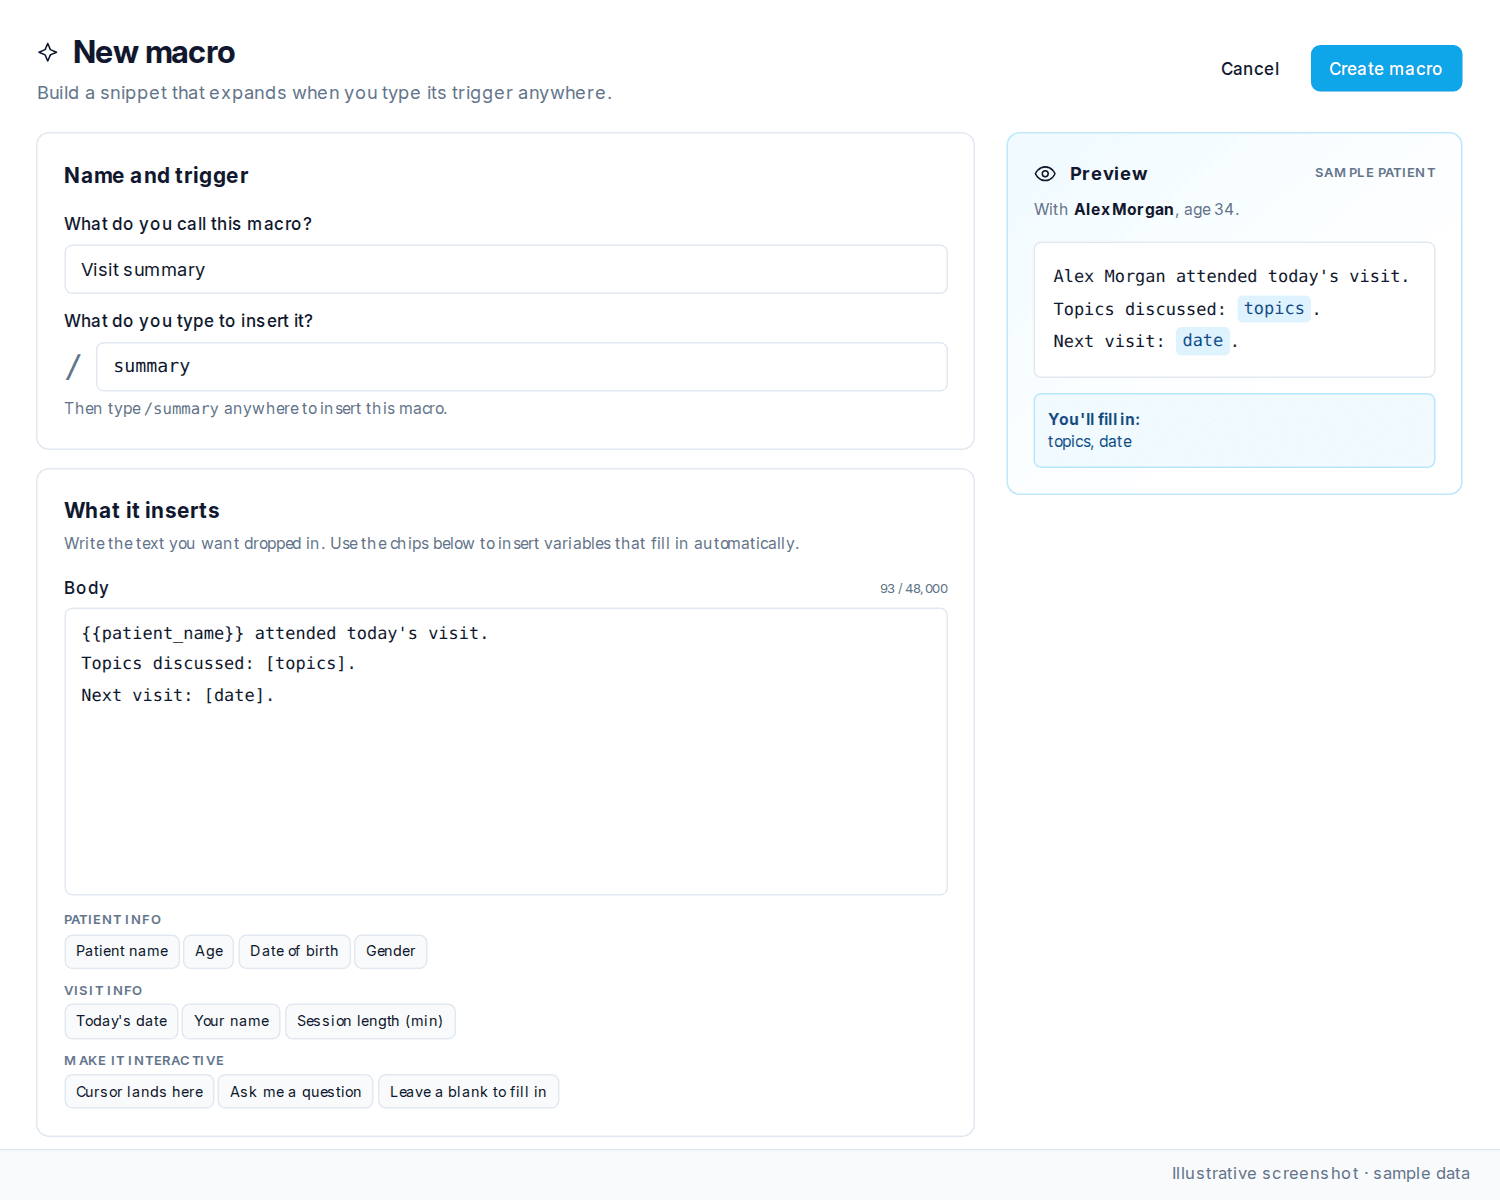
The body limit is 48,000 characters. Delete on the edit form removes the macro; snippets already inserted into notes are unaffected.
Generate with AI
- Click Generate with AI.
- In What should this macro say?, describe the snippet.
- Click Generate macro. The form opens with the draft loaded.
- Review the trigger, body, and variables, then click Create macro.
Fillable fields
Three markers make a macro interactive:
{{prompt:Question?}}asks a question when you insert the macro. The Fill in macro details dialog collects your answers. Click Insert.[blank]marks a value to fill after insert. The Complete macro fields dialog lists the bracketed values. Click Apply.{{cursor}}places the cursor at that spot after insert.
The macro library
- Click Browse library.
- Search starters by name, content, or keywords, or filter by category. Featured starters appear first, then All starters.
- Click Add on a starter. It is copied to your macros; the button changes to Added.
- Open the copy from the Macros page to customize it. Start blank opens an empty form instead.
Use a macro in a note
- In the note editor or a supported textarea, type
/. - Keep typing to filter by trigger. The menu groups macros by category.
- Use the arrow keys to pick one and press Enter or Tab to insert. Escape closes the menu.
- Answer any prompts, then fill any bracketed fields.
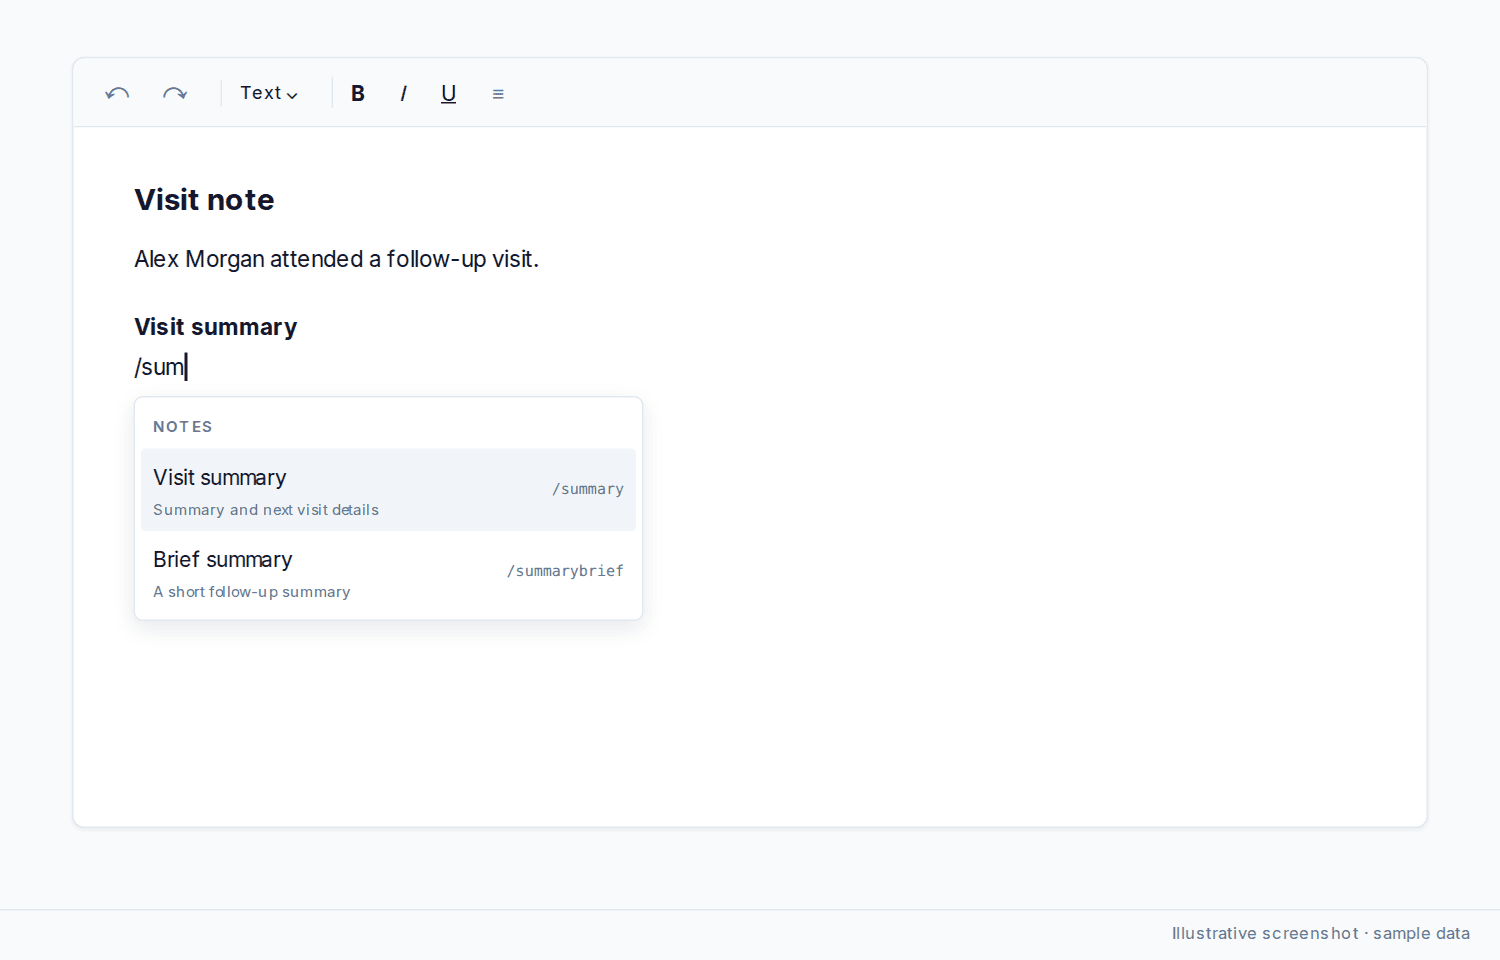
If the menu shows No matching macros, create one in the Macros app.
Turn the slash menu off
Go to Settings → Display → Macros. The Slash (/) shortcut switch enables the slash menu in the rich text editor and supported textareas. Manage macros opens the Macros page.
Was this article helpful?
Still stuck? Our team answers in the messenger.